4 Things you should do when you move into a New Home
4 Things you should do when you move into a New Home
A Little Housekeeping:
The Essential Stuff You Should Know
This may not be what you first think of when you move into a new home, but it could save you alot of money. Think of this as a “getting to know your home” exercise.
These are essental checks thatyou should make in your New Home. They could save you money and might even save your life. They will definitely stop a plumber from giving you that pitying look when you’re not sure where the water turns off.
Step 1: Stick the Kettle on
We all know nothing productive happens without a cuppa first. So, brew up and let’s crack on.
Step 2: Get Familiar with your Electricity Supply
You might think you know where the Consumer Unit (fuse box, for us mere mortals) is, but let’s be sure, shall we? Now, ask yourself these important questions:
Can I turn it off quickly if I need to?
Go on, try switching it off and back on again. If it’s buried at the back of a cupboard, do yourself a favour and keep the path clear – no one wants to dig through old paint cans or a mountain of camping gear in an emergency. Also, maybe avoid storing anything flammable in there? Just a thought.
Is it properly labelled?
Can you clearly tell which switch controls what, or does it feel more like a raffle? If it’s the latter, sorting that out should be a priority. If you’re not sure how to do this, check out our post on Consumer Units
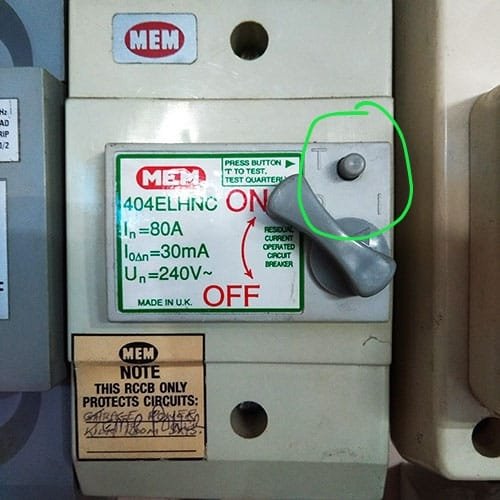
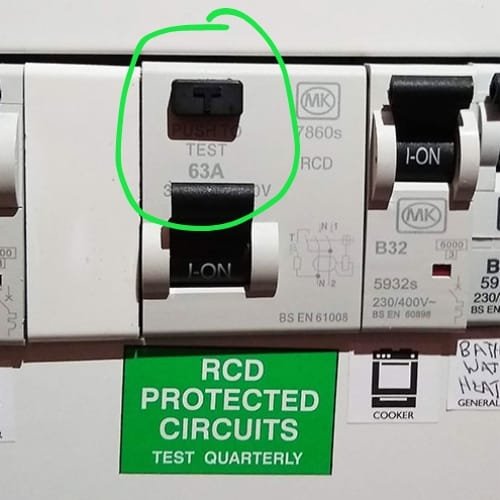
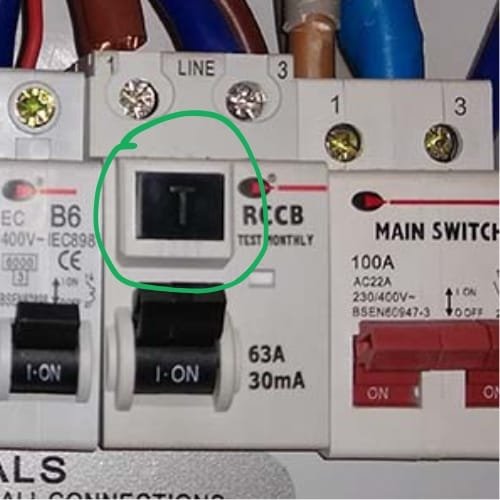
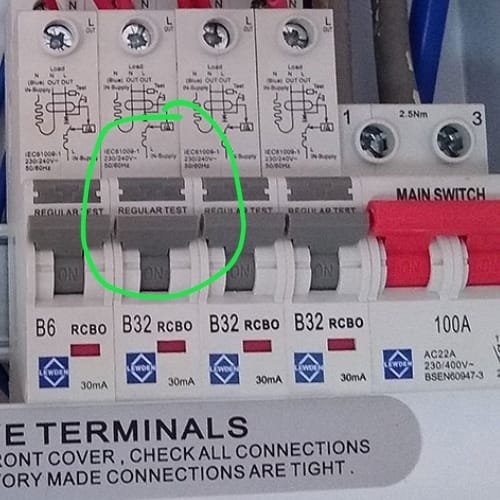
Do you have an RCD?
If you’ve no idea what that is, have a look at Electrical Safety First, who explain what they are, and why they are an extremely good thing to have. It’s important.
If you do have one, test it! Press the “T” or “Test” Button and make sure it’s still doing its job. A little maintenance never hurts.
What type of Consumer Unit do you have?
This probably seems a bit of strange question, but its good to know the answer. You may have listened to your Solicitor’s advice and had an electrical survey carried out as part of the buying process. If you did, you should know a bit more about this, and should have a certificate to refer to. If you’re not sure what the certificate actually tells you, go back to the electrician who carried out the inspection for you. They can explain. Failing that, you can always contact us, and we can explain it to you.
If you didn’t have an electrical inspection, check out our post on Consumer Units – Know your Stuff. There’s a bit of useful information there, explaining what you’e looking.
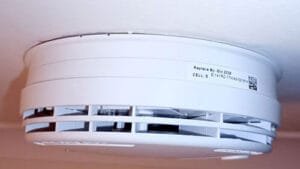
Look for a Smoke & Heat Detectors
Hopefully your new Home has Smoke and Heat Detectors installed. If they do, please give them a quick Test, by pressing the TEST button. Check the Expiry date while you’re there.
If you can’t find any Smoke/Heat Detectors, or they are past their expiry date, please make getting new ones installed a priority.
Check out our post on Smoke Detector Safety, if you need more information
And lastly……..Take a Meter Reading
You don’t want to be paying for the last occupants’ Electricity, so take a Meter reading and submit it to your supplier. Ideally, take a photo of the reading, so that you have a Time & Date Stamp to refer back to.
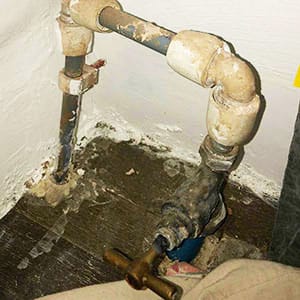
Step 3: Discover where your Water Supply turns off
You’d be surprised how many people have no clue how to turn off their water. In fact, a lot of people who come on our DIY courses haven’t a clue either. I get it – it’s not something you think about until water’s gushing from somewhere it really shouldn’t be. But trust me, you don’t want to be on a frantic treasure hunt while the insurance claim’s ticking up.
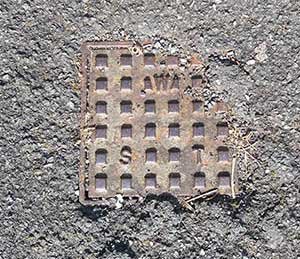
1. Start Outside – Look for the Pavement cover
You’ll likely find a small cover near your front gate – that’s where the external stopcock hides. If you live in a flat, identifying which one’s yours can be a bit of a guessing game. Turning them off one by one works, but it might lead to some awkward neighbourly encounters (especially if they’re mid-shower).
It should look something like this. It might even have “Water” written on it:
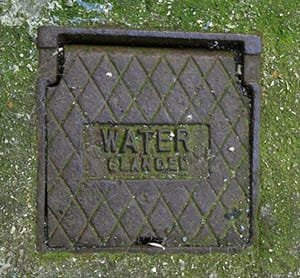
Old Style Metal Cover
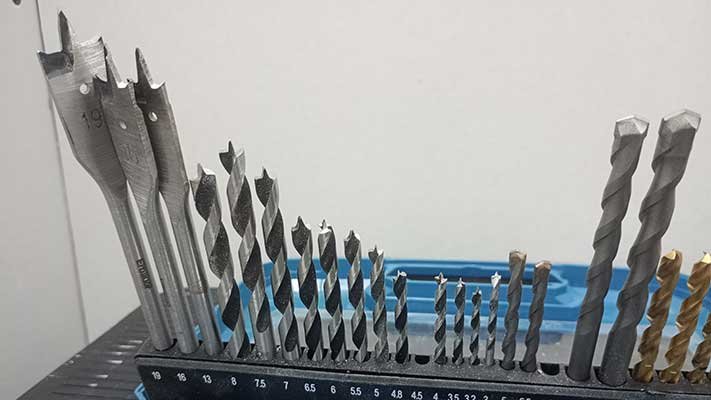
Use a Flathead Screwdriver to flip the Top up

Modern Plastic Cover
Use a Flathead Screwdriver to flip the Cover up

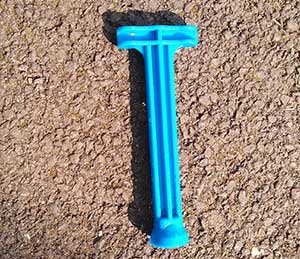
Annoying "Turn" Cover
Don’t be fooled. This Cover turns anti-clockwise to open. Badly thought-out design, which isn’t installed any longer. Try twisting it, it might come up. If not contact your Water Supplier and get them to replace it.
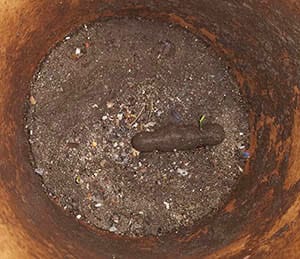
Metal Cover Stuck Down
Not uncommon if the Pavement has been resurfaced. Get it unstuck now, before you have an emergency, and can’t get the cover up.
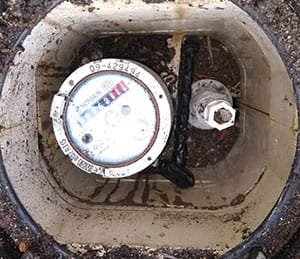
Take a Meter Reading
If you find it, and it has a meter, take a meter reading. Again, I would take a photo, just for posterity.
Its also worth double-checking that it doesn’t keep running when you’ve turned the supply off. If it does, then you may be paying for someone else’s supply. Rare, but not impossible
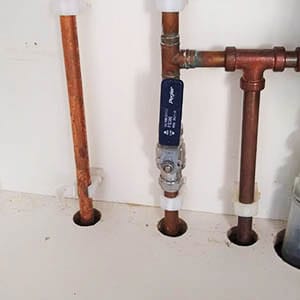
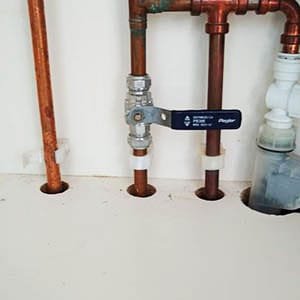
2. Check Indoors
The usual suspects are under the kitchen sink or in a utility room, but I’ve come across them in all sorts of weird places – under floorboards, hidden in random cupboards. Start with the obvious and work your way to the downright bizarre.
Check out our other post on Finding Your Stop Tap
3. Still Can’t Find It?
Ask your new neighbours – they might have the same setup and could save you some time. If that doesn’t work, contact your water supplier – they might have a record of it. If you’re still out of luck, put it on your to-do list and get a plumber involved. They can install one in a more sensible spot.
Step 4: Gas or Oil - Find the OFF Switch
Mains Gas
Your gas meter will likely be near the front of the house, possibly in a little box outside. Make sure you can turn it off without too much faff. If it’s locked up, get yourself a meter box key – they’re cheap as chips at your local hardware store.
LPG or Oil
These tanks aren’t exactly discreet – you’ve probably tripped over them a few times already. Just double-check you know where the shut-off valve is, and maybe have a quick peek at security while you’re at it – oil theft’s a thing in the countryside.
Look for a Carbon Monoxide Detector
If you have a Gas or solid-fuel Boiler, or a multi-fuel stove, you also need to have a Carbon-Monoxide Detector.
If you can’t find one in your new home, please pop down to the nearest DIY/Hardware store/Supermarket & buy one NOW.
You may have no idea when the last service was carried out on these appliances.
You don’t want your first night in your new home to be your last. I know that sounds dramatic, but Carbon Monoxide is invisible. It doesn’t smell, and it can kill you very quickly.
Give yourself a Round of Applause
You’ve just ticked off three essential checks that most people ignore until disaster strikes. Sure, dealing with a crisis is a crash course in home maintenance, but wouldn’t you rather be prepared than panicked?
If you’re renting, your landlord really should have told you all this. If they didn’t, maybe give them a gentle nudge – it’s in their best interests too, after all!